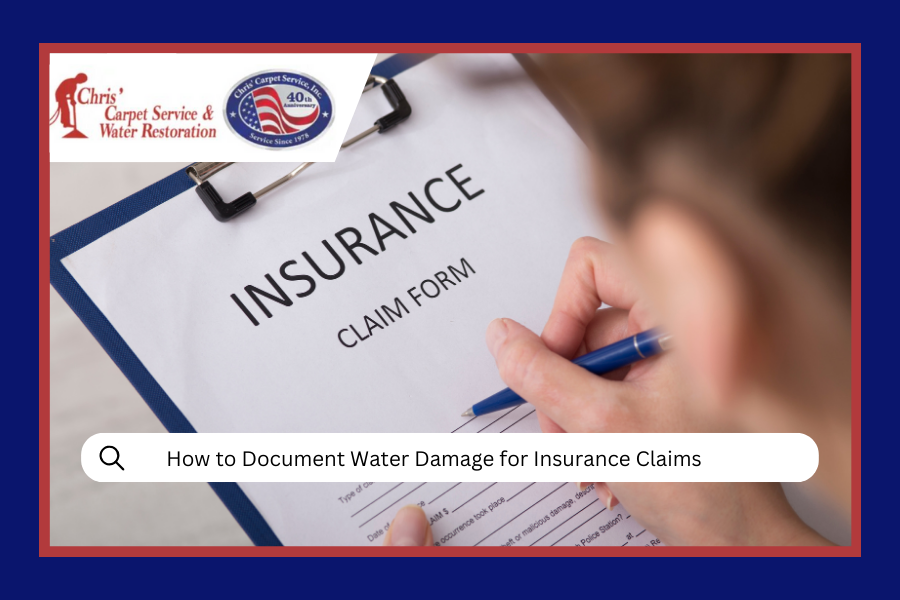
How to Document Water Damage for Insurance Claims
Jump to Section:
- Why Documentation Matters
- Step 1: Stop the Water Source
- Step 2: Take Photos and Videos
- Step 3: Document in Writing
- Step 4: Save All Receipts
- Step 5: Contact Your Insurance Company
- Step 6: Create an Inventory
- Step 7: Work with Professionals
- Step 8: Keep Communication Records
- Step 9: Don't Throw Anything Away
- Step 10: Follow Up Regularly
- Common Mistakes to Avoid
- FAQs
Water damage never happens at a convenient time. One minute you're living your life, and the next, you're standing in a puddle wondering how this became your Tuesday. Whether it's from a burst pipe, storm flooding, or an appliance that decided today was the day to quit, the aftermath can feel overwhelming. But here's the thing: proper documentation can make the difference between a smooth insurance claim and months of frustration.
At Chris' Carpet Service & Water Restoration, we've helped Tampa Bay homeowners navigate this process since 1976. We've seen what works and what doesn't when it comes to insurance claims. Think of this guide as your game plan for turning chaos into a clear path forward. Our water damage restoration team handles the heavy lifting, but knowing how to document everything properly? That's something every homeowner should have in their back pocket.
Why Documentation Matters More Than You Think
Insurance companies need proof. It's not that they don't trust you, it's just that "there was a lot of water" doesn't translate well on a claim form. Good documentation tells the complete story of what happened, what got damaged, and what it'll take to fix it. Skip this step, and you might find yourself arguing over coverage months down the road when memories have faded and evidence has disappeared.
The better your documentation, the faster your claim gets processed. Simple as that.
Need Help Right Now?
Water damage doesn't wait, and neither should you. Our team is available 24/7 to start your restoration and help document everything properly.
Contact Us NowCall: (727) 888-5111
Step 1: Stop the Water Source (If Safe to Do So)
Before you start snapping photos, you need to stop the water if you can do it safely. Turn off the main water valve if it's a plumbing issue. Move furniture out of harm's way if possible. Your safety comes first, though. If water is near electrical outlets or you're dealing with sewage, call professionals immediately.
Document this step too. Take a photo of the shut-off valve in the off position. Note the time you discovered the damage and when you stopped the source. These details matter when insurance companies start asking questions about mitigation efforts.
Step 2: Take Photos and Videos Immediately
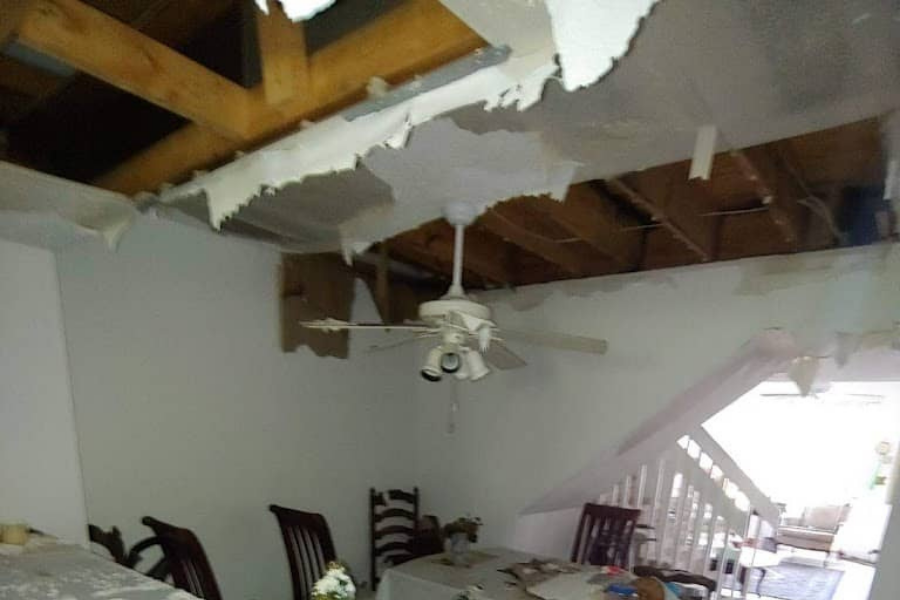
Ceiling water damage requires immediate documentation with photos showing the full extent of staining and structural impact.
This is where your smartphone becomes your best friend. Start taking photos and videos as soon as it's safe. We're talking comprehensive coverage here:
What to photograph:
- Wide shots showing the full extent of the damage
- Close-ups of specific damaged items
- Water level marks on walls
- Damaged flooring, carpets, and furnishings
- Any visible mold growth (if the damage isn't brand new)
- Serial numbers and model information on damaged appliances
- The water source and what caused the damage
Take more photos than you think you need. You can always delete extras, but you can't go back in time to capture what you missed. Video walkthroughs work great too, especially for showing the scope of damage across multiple rooms.
Pro tip: Include something in the frame for scale, like a ruler or even your foot. It helps insurance adjusters understand just how deep that water was.
Step 3: Document Everything in Writing
Photos tell part of the story, but written records complete it. Start a detailed log that includes:
- Date and time you discovered the damage
- What caused it (as best you can tell)
- What immediate actions you took
- List of damaged items with descriptions
- Approximate age and value of damaged items
- Any temporary repairs you made
- Names of everyone you spoke with (contractors, insurance reps, plumbers)
Keep this log updated as the situation develops. When mold remediation becomes necessary a week later, you'll have a clear timeline showing how things progressed.
Water Damage Documentation Checklist
Photos & Videos
Capture wide shots, close-ups, and video walkthroughs
Written Log
Date, time, cause, and all actions taken
All Receipts
Save every expense related to the damage
Item Inventory
List everything damaged with values and photos
Step 4: Save All Receipts and Invoices
Every penny you spend related to this water damage needs documentation. This includes:
- Emergency repair costs
- Water extraction and cleanup services
- Temporary housing if you had to leave your home
- Rental equipment like dehumidifiers or fans
- Replacement items you had to buy immediately
- Even meals if you couldn't use your kitchen
Don't assume the insurance company will automatically reimburse you. If you don't have a receipt, it didn't happen as far as they're concerned. Our team provides detailed invoices that break down exactly what work was performed, which makes the claims process much smoother.
Step 5: Contact Your Insurance Company Quickly
Most policies require you to report damage within a specific timeframe. Read your policy or call your agent to understand your deadlines. When you call, have your documentation ready. You'll need your policy number, the date of loss, and a clear explanation of what happened.
Ask about your coverage specifics. What's included? What's your deductible? Do they have preferred contractors, or can you choose your own? According to the Insurance Information Institute, understanding your policy before filing can prevent surprises later.
Don't embellish or guess. Stick to the facts you can prove with your documentation. If you're not sure about something, say so.
Step 6: Create an Inventory of Damaged Items
Make a comprehensive list of everything affected by the water damage. For each item, include:
| Item Details | What to Record |
|---|---|
| Description | Be specific: "leather sectional sofa" not just "couch" |
| Purchase date | Even approximate dates help |
| Original cost | Check old receipts or bank statements |
| Current condition | Note if it's destroyed or can be salvaged |
| Photos | Reference which photos show this item |
This inventory becomes the foundation of your claim. Items you forget to list might not get covered, so take your time with this step. Check closets, storage areas, and places you might overlook in the initial chaos.
For high-value items, dig out purchase receipts if you have them. Original packaging, warranties, or appraisals add credibility to your claim values.
Step 7: Work with Professional Restoration Services
This is where things get real. Professional restoration companies don't just clean up the mess, they provide detailed documentation that insurance companies actually respect. We create moisture maps, take thermal images, and provide daily progress reports that show exactly what work was done.
Our St. Petersburg water damage team uses industry-standard equipment to monitor drying progress. These readings become part of your claim documentation, proving that proper procedures were followed.
Plus, we speak insurance language. We know what adjusters need to see, and we provide reports formatted the way they expect. It removes a huge headache from your plate.
Step 8: Keep Communication Records

Working closely with insurance professionals and documenting all communications helps ensure your claim moves forward smoothly.
Every conversation about your claim should be documented. When you talk to your insurance adjuster, write down:
- Date and time of the conversation
- Name of the person you spoke with
- What was discussed
- Any commitments or promises made
- Reference numbers or claim updates
Follow up phone conversations with emails summarizing what was discussed. It creates a paper trail if disputes arise later. Save all emails, letters, and official correspondence in a dedicated folder.
If the adjuster visits your property, be there if possible. Take notes on what they examine and any comments they make. Ask questions if something's unclear.
Step 9: Don't Throw Anything Away Too Soon
We know the urge to just get rid of everything damaged and start fresh. Resist it. Your insurance adjuster needs to see the damage firsthand. Throwing items away before the adjuster visits can hurt your claim.
That said, you do need to prevent further damage. Remove wet materials that could cause mold growth, but keep them in a safe place like your garage or yard. Take extensive photos before moving anything.
Once the adjuster has documented everything and given you the green light, then you can dispose of damaged items properly. Until then, everything stays.
Step 10: Follow Up on Your Claim Regularly
Filing the claim isn't the finish line. Stay on top of the process by checking in regularly. Insurance claims can drag on if nobody's pushing them forward. Call every week or two for updates. Ask specific questions:
- Has the adjuster reviewed all documentation?
- Are any additional photos or information needed?
- What's the timeline for a decision?
- When can you expect payment?
Being politely persistent shows you're serious about your claim. It also prevents your file from sitting forgotten on someone's desk.
Common Documentation Mistakes to Avoid
Even with the best intentions, homeowners make mistakes that complicate their claims. Here's what to watch out for:
Starting repairs before documentation: We get it, you want your home back to normal. But major repairs before the adjuster sees the damage can raise red flags. Emergency mitigation is fine, reconstruction is not.
Incomplete photo documentation: Don't just photograph the obvious damage. Get shots of model numbers, serial numbers, and proof of purchase when possible. The more evidence, the better.
Missing receipts: If you hire someone for emergency repairs or buy emergency supplies, keep every single receipt. Even that $20 tarp from Home Depot counts.
Not reading your policy: Know what's covered and what's not before you file. Coverage for sewage backup damage might require a separate rider, for example.
Exaggerating damage: Stick to the facts. Inflating claims can result in denial of your entire claim, not just the exaggerated parts.
How Professional Restoration Companies Help with Documentation
Look, you can absolutely document water damage yourself. But professional restoration companies bring tools and expertise that strengthen your claim significantly. We provide:
- Detailed moisture readings throughout the drying process
- Thermal imaging that shows hidden moisture
- Professional photos documenting the entire restoration
- Daily logs of work performed
- Equipment lists and specifications
- Industry-standard reporting that adjusters trust
Insurance adjusters see hundreds of claims. They know what professional documentation looks like versus amateur efforts. Our reports carry weight because they follow IICRC standards that the insurance industry recognizes.
We've also learned what information adjusters need. We don't waste their time with irrelevant details, but we don't leave gaps either. Our documentation tells a complete, credible story from start to finish.
When you're dealing with extensive damage across locations like Clearwater or Tampa, having professionals handle documentation while you focus on your family makes a huge difference.
The Bottom Line on Water Damage Documentation
Good documentation is your insurance policy for your insurance policy. It protects you when disputes arise and speeds up the entire claims process. Yes, it takes time and effort when you're already stressed and overwhelmed. But skipping these steps costs you more in the long run.
Start documenting immediately, be thorough, and don't throw anything away until you get approval. Keep every receipt, take hundreds of photos, and write everything down. Work with professionals who understand what insurance companies need to see.
Water damage is stressful enough without fighting your insurance company over inadequate documentation. Do it right the first time, and you'll thank yourself when that claim check arrives without the headache.
Ready to Get Your Water Damage Claim on Track?
Need help navigating both the restoration and the insurance process? That's literally what we do every single day. Our team at Chris' Carpet Service & Water Restoration has decades of experience working with insurance claims in the Tampa Bay area. We know what adjusters want to see, and we make sure they see it.
Call us at (727) 888-5111
Contact Us TodayAvailable 24/7 because water damage doesn't keep business hours.
Frequently Asked Questions
How soon should I start documenting water damage after I discover it?
Immediately. As soon as it's safe to enter the affected area, start taking photos and videos. Water damage progresses quickly, and conditions change as drying begins. The initial state of damage is crucial for your insurance claim. Document first, then start mitigation efforts. If you're dealing with an emergency situation, call professionals right away at (727) 888-5111 and we'll help with both restoration and documentation.
What if I already threw away damaged items before documenting them?
Contact your insurance company right away and explain the situation. While it's not ideal, you may still be able to file a claim if you have other evidence like purchase receipts, photos of the items before damage, or witness statements. For future reference, always photograph items before disposal, even if they're clearly ruined. Keep damaged materials accessible until your adjuster gives approval to dispose of them.
Do I need to hire a public adjuster for my water damage claim?
Not necessarily. Many straightforward water damage claims process smoothly without a public adjuster, especially when you have thorough documentation and work with a professional restoration company. Public adjusters typically take 10-15% of your settlement, so they're most beneficial for large, complex, or disputed claims. If your insurance company denies coverage or offers a settlement that seems too low, then consider consulting a public adjuster or attorney.
Will my insurance cover temporary housing if I can't stay in my home during restoration?
Many homeowners policies include "loss of use" or "additional living expenses" coverage that pays for temporary housing, meals, and other costs if your home is uninhabitable. Check your specific policy for coverage limits and requirements. Document all expenses related to temporary housing with receipts, and keep your living arrangements reasonable. The coverage typically requires that the damage made your home unsafe or unlivable, not just inconvenient.